PostgreSQL Create Table
Create Table
This document discusses how to create a table in PostgreSQL using the command line, pgAdmin III and phppgAdmin. For ease of understanding, each process is complemented by screenshots taken while doing.
Create Table using command line in Linux
Start terminal and execute the following command:
sudo -u postgres psql postgres
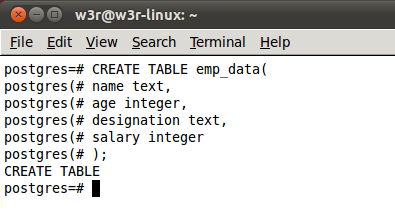
This command will bring you to the PostgreSQL command prompt. Now, to create a table issue the following command.
CREATE TABLE emp_data (
name text,
age integer,
designation text,
salary integer
);
The above command will create a table called emp_data with four columns - name, age, designation and salary and their datatypes are text, integer, text and integer.
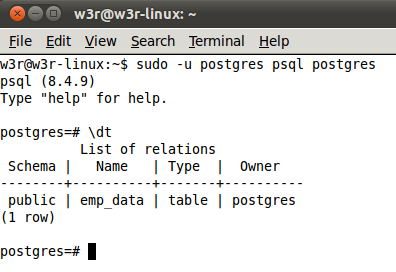
If you want to see whether the table is actually created, issue the following command.
\dt
This will show you the table you have created, as shown in the following image.
To delete an existing table issue the following command.
DROP TABLE emp_data;
The above command deletes the emp_data table.
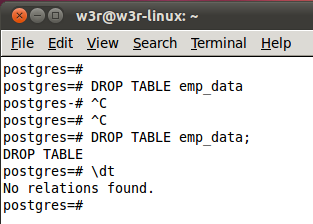
Create Table using pgAdmin III
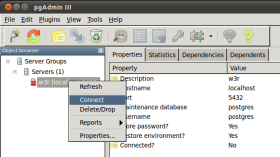
Start pgAdmin III from Application > Programs > pgAdmin III if you are using Linux and All Programs > PostgreSQL 9.1 > pgAdmin III if you are using Windows. Then right click on your server on the right pane of your pgAdmin III window and click connect. Now your server is connected.
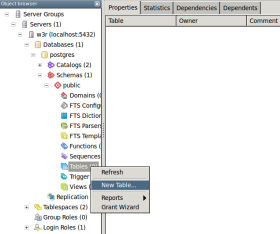
Now reach "tables" in pgAdmin III window, right click on "tables" and click on "New Table".
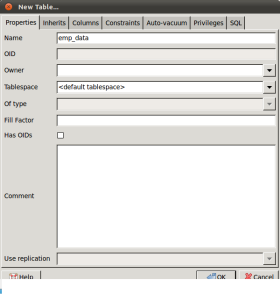
This will open a new window to create a New Table. Supply a name of your new table and then click on Columns.
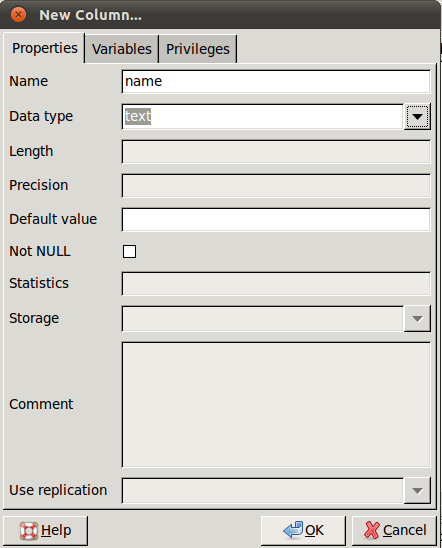
Now in the columns window, you can add columns you want and their data types by clicking "Add" and clicking on "Ok" after you finish supplying a name and data type for each column.
After you finished creating a table, you can see the detail of the table as shown below.
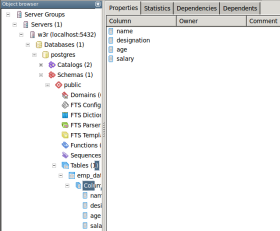
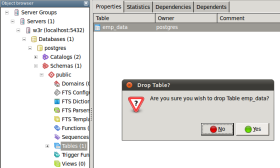
To delete the table select the table, right-click and click on "Delete/Drop". When prompt, say "Yes".
Create Table using phpPgAdmin
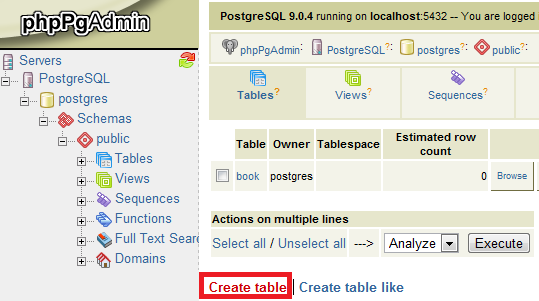
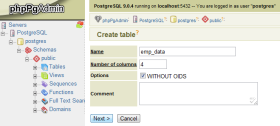
Login to phpPgAdmin and reach "Public" database. Now click on "Create table" in the right hand pane of the phpPgAdmin window.
In the next window, supply name and number of columns you want to create and click "Next".
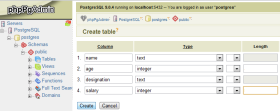
In the next window, supply name of the column, data type and click "Create".
If you have successfully created the table, you can see the table you have created as shown below.

Note:
There are other options or variables available while you create a table, like setting primary or foreign key. But for the sake simplicity, we kept those options out of the scope of this document. But we will discuss all those in detail while we progress.
Previous: Create Database
Next: Insert Data

