Working with package.json: Manage Local Packages Efficiently
In the previous tutorial we looked at the installation, update and uninstallation of local packages. The current article will teach you how to work with package.json. The best way for you to manage locally installed packages is for you to create a package.json file.
A package.json file will:
- list the packages that your project depends on.
- enable you to specify the versions of a package that your project can use using semantic versioning rules.
- make your build reproducible, and therefore much easier for you to share with other developers.
Requirements
These are the things that a package.json file should contain:
- "name"
- all lowercase
- one word, no spaces
- hyphens and underscores allowed
- "version"
- in the form of x.x.x
- follows semver spec
For example:
{
  "name": "my-awesome-package",
  "version": "1.0.0"
}
Creating a package.json
You can create a package.json file in two basic ways.
- Run a CLI questionnaire
- Create a default package.json
If you want to create a package.json with values that you supply, you should run:
npm init
This initiates as command line questionnaire that will conclude with the creation of a package.json in the directory in which you initiated the command.
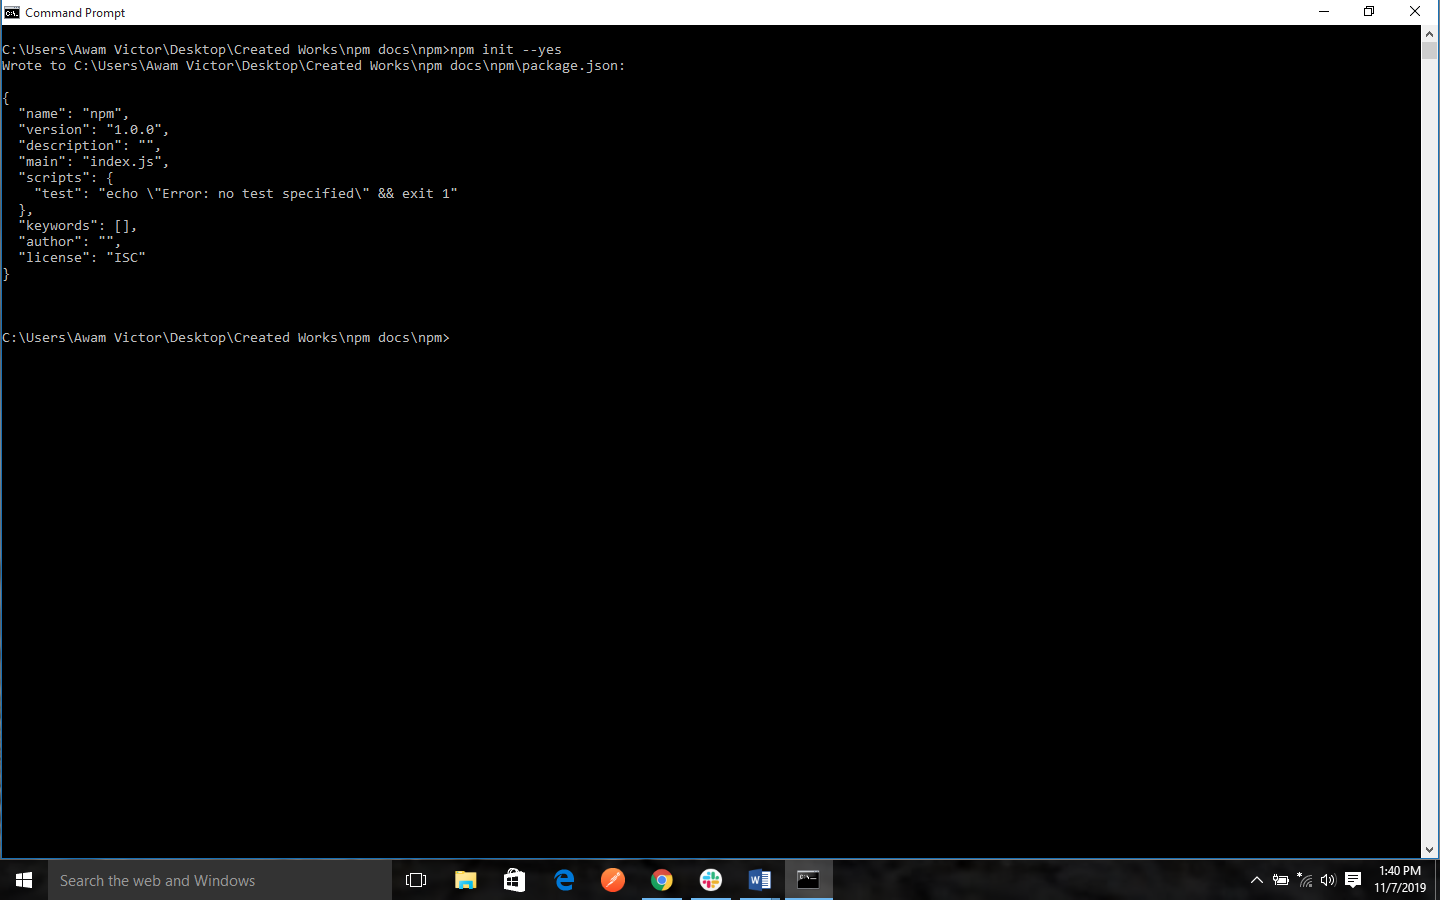
If you want to get a default package.json file, you will need to run npm init with the --yes or -y flag:
npm init --yes
This method generates a default package.json using information extracted from the current directory.

npm init --yes>
Wrote to C:\Users\Awam Victor\Desktop\Created Works\npm docs\npm\package.json:
{
  "name": "npm",
  "version": "1.0.0",
  "description": "",
  "main": "index.js",
  "scripts": {
    "test": "echo \"Error: no test specified\" && exit 1"
  },
  "keywords": [],
  "author": "",
  "license": "ISC"
}
- name: this is the current directory name
- version: is always 1.0.0
- description: this is the info from the readme, or an empty string ""
- main: is always index.js
- scripts: by default, this will create an empty test script
- keywords: empty
- author: empty
- license: ISC
- bugs: this is the info from the current directory, if present
- homepage: this is the info from the current directory, if present
you can equally set several config options for the init command. Some of the useful ones are:
npm set init.author.email "[email protected]"
   npm set init.author.name "ag_dubs"
   npm set init.license "MIT"
NOTE:
If there is no description field in the package.json, npm will use the first line of the README.md or README instead. The description will help people find your package when searching npm, so it is definitely useful to make a custom description in the package.json to make your package easier to find.
How to Customize the package.json questionnaire
If you expect to create so many package.json files, you might want to customize the questions asked during the init process, so that the files will always contain key information that you expect. You can also customize the fields and the questions that are asked.
To do this, you have to create a custom .npm-init.js in your home directory ~/.npm-init.js.
A simple .npm-init.js will look something like this:
module.exports = {
  customField: 'Custom Field',
  otherCustomField: 'This field is really cool'
}
Running npm init with this file in your home directory will output a package.json that included these lines:
{
  customField: 'Custom Field',
  otherCustomField: 'This field is really cool'
}
You can equally customize the questions by using the prompt function.
module.exports = prompt("what is your favorite flavor of ice cream?", "I LIKE THEM ALL");
Specifying Dependencies
If you want to specify the packages your project depends on, you will need to list the packages that you would like to use in your package.json file. There are 2 types of packages that you can list:
"dependencies": These are packages that are required by your application in production.
"devDependencies": These are packages that are only needed for development and testing.
Manually editing your package.json
You can also manually edit your package.json. You will need to create an attribute in the package object that is called dependencies that points to an object. This object holds attributes that name the packages you would like to use. It points to a semver expression that specifies the versions of that project that are compatible with your project.
If you have dependencies that you only need to use during local development, you have to follow the same instructions as above but use the attribute called devDependencies.
For instance, the project below will use any version of the package my_dep that matches major version 1 in production and then requires any version of the package my_test_framework that matches major version 3, but this will only be for development:
{
  "name": "my_package",
  "version": "1.0.0",
  "dependencies": {
    "my_dep": "^1.0.0"
  },
  "devDependencies" : {
    "my_test_framework": "^3.1.0"
  }
}
The --save-prod and --save-dev install flags
The easier (and more awesome) way for you to add dependencies to your package.json is to do so from the command line, when you flag the npm install command with either --save-prod (assumed by default) or --save-dev, depending on how you would like to use that dependency.
If you want to add an entry to your package.json's dependencies:
npm install [--save-prod]
If you want to add an entry to your package.json's devDependencies:
npm install --save-dev
Managing dependency versions
npm will use Semantic Versioning, or, as it is often referred to as, SemVer, to manage your versions and ranges of versions of packages.
If you have a package.json file inside your directory and then you run npm install, npm looks at the dependencies that are listed in that file and downloads the latest versions, with the help of semantic versioning.
Previous:
How to Install and Manage Local npm Packages.
Next:
Installing, Updating, and Uninstalling Global npm Packages.
