Create, publish and use your first composer package
Introduction
The Composer as we know is a PHP dependency manager, and in the previous tutorial, we looked at the steps necessary to create and publish our package in a version control system such as git and how to publish this our package on Packagist.
In this tutorial, we create a simple “hello-composer” application, push this to GitHub and publish it on Packagist then create another local “use-hello-composer” application to consume this “hello-composer” application hosted on GitHub.
This tutorial will assume you have a GitHub account and know a little about Git, but if you don’t have any previous knowledge on any of these, don’t worry you will still follow along as I will give you all the commands you need to get along with the tutorial.
So, to kick off, go to www.github.com and quickly create an account if you don’t have one also download and install it to your local machine and we are set. You can also refer to our previous tutorial on how to set up composer on your system, if you don’t have it set up already.
Quickly we create a new folder “hello-composer” and navigate to this folder from our terminal. Using the “composer init” command we will initialize composer on this project and setup the necessary parameters. At the end of the setup our composer.json file should look like this:
{
    "name": "vitalis/hello-composer",
    "description": "A simple hello world composer package",
    "type": "library",
    "license": "MIT",
    "authors": [
        {
            "name": "Ogbonna Vitalis",
            "email": "[email protected]"
        }
    ],
    "minimum-stability": "stable",
    "autoload": {
        "psr-4": {"vitalis\\HelloWorld\\": "src/"}
    },
    "require": {}
}
The above code snippet was generated by running the “composer init” command at the terminal and the previous tutorial, we learned about all the fields there except the “autoload” field.
# PSR-4 Autoload
PSR-4 is the current autoload standard that defines a key by mapping from namespaces to paths, relative to the package root. When autoloading a class like Vitalis\\HelloWorld\Index, a prefix Vitalis\\ pointing to a directory scr/ means that the autoloader should look for a file named src/HelloWorld/index.php and include it if present.
Thus, in the above code snippet we told composer that all the files with the namespace “vitalis\HelloWorld” inside the “scr/” folder (yet to be created) of our package should be autoloaded. Namespaces must end with \\ to avoid conflicts with namespaces with similar prefixes. or example “Taa” would match classes in the namespace “TaaCom” so the trailing backslashes solve the problem: Taa\\ and TaaCom\\ are distinct.
With that, we are free set to publish this package and when published and installed, it can be instantiated.
Quickly, inside the root directory of our “hello-word” package, create the “src” folder and inside this folder create an “index.php” file, which will contain the contents of our class as shown below:
<?php

namespace vitalis\HelloWorld;

class Index
{
    public function greet($greet = "Hello World")
    {
        return $greet;
    }
}
In the above code snippet we declared a namespace with the name “vitalis\HelloWorld”, and the class “Index” and inside this class, we have a function “greet”.
#Hosting Our Package
In order to publish our “hello-word” package in Packagist, you will need to host our package in a repository first with version control as GIT, Subversion or Mercurial. As earlier stated, we are going to use GitHub to host our package.
We will create a GitHub repository in our GitHub account, using our package name as the name of the repository (in this case “hello-composer”) and license if we wish.
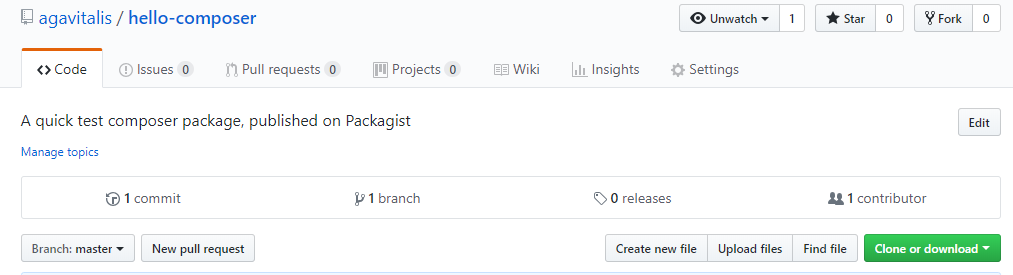
Once we have created this repository as shown above, we clone the repository in our machine using the Clone/download button and copy the contents of our package to it. Then we commit and upload back to GitHub.
Our new package can now be accessed using https://github.com/agavitalis/hello-composer.git and our package repository accessed using https://github.com/agavitalis/hello-composer
#Register package on Packagist
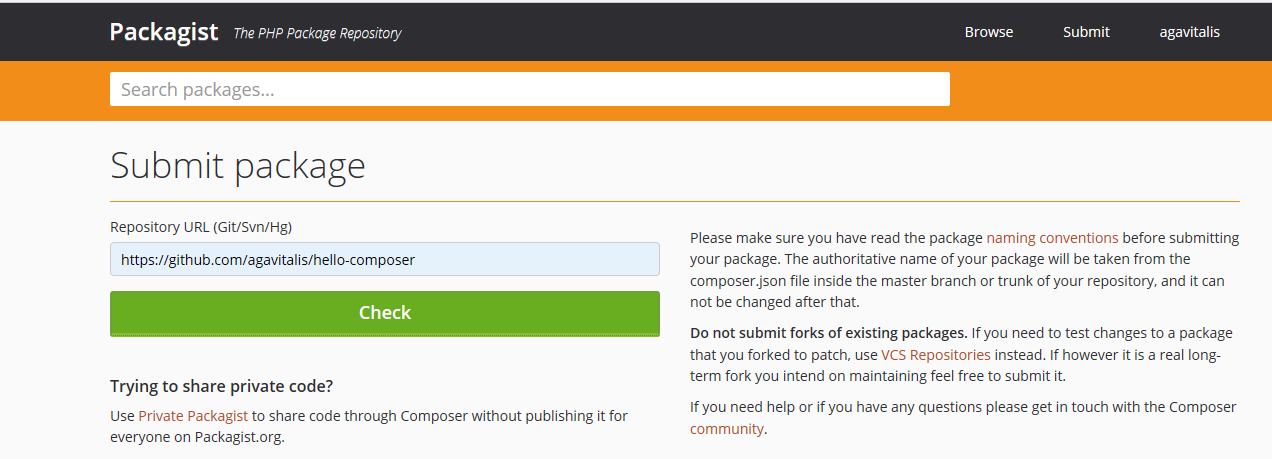
To register our newly created package on Packagist simply, go to https://packagist.org create an account with them if don’t have one and then submit the URL of our repository, as shown below:
Once our package is accepted, our dashboard will look like the one shown below:
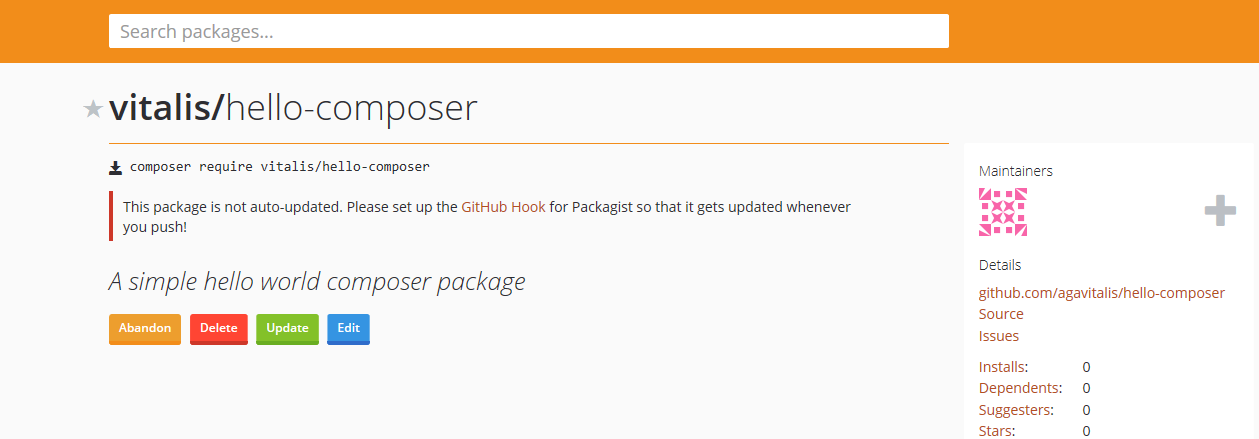
The auto-update warning is simply telling us that our package is not auto updated. We will be fixing that in the next tutorial, but for now lets quickly create another project to then consume this package we created.
#Requiring and Testing Our Package.
To test the package we just published, quickly create a new project directory and initialize composer in this directory just like we did above, the composer.json file for this composer will look like this:
{
    "name": "vitalis/hello-composer",
    "description": "A simple hello world composer package",
    "type": "library",
    "license": "MIT",
    "authors": [
        {
            "name": "Ogbonna Vitalis",
            "email": "[email protected]"
        }
    ],
    "minimum-stability": "stable",
    "autoload": {
        "psr-4": {"vitalis\\HelloWorld\\": "src/"}
    },
    "require": {}
}
Now we must require the package we just published using the composer install command as shown in the code snippet below
composer require vitalis/hello-composer
Also ensure that the minimum-stability of the package you want to install is the same as the one you are installing it in, so as to avoid some annoying errors.
#Using the installed Package
To use our installed package, we create an “index.php” at the root of our “test-hello-composer” directory and then require the just downloaded file as shown in the code snippet below:
<?php

require_once __DIR__ . '/vendor/autoload.php';

use vitalis\HelloWorld\Index;

$greeting = new Index();

echo $greeting->greet("Hello Composer");

}
In the above code snippet we required the “vendor/autoload.php” where and then used the namespace of the package we downloaded to enable us instantiate a class in this package.
#Testing our Code
To test if our code is working, we navigate to this “test-hello-composer” directory from the terminal and run the “index.php” file using “php” command, as shown in the code snippet below:
php index.php
Voila!!! We have successfully created, published and used our first composer package. If you love this tutorial, don’t forget to share, like and comment. Follow us on twitter for more updates.
You can get the complete versions of this packages on GitHub at hello-composer and test-hello-composer.
In the next tutorial, we look at how to auto-update our packages using webhook. See you soon.
Previous:
Making libraries or packages installable using composer
Next:
How to auto-update composer packages with webhooks